Introduction
You can create several statuses assigned to your customers within VGM. These statuses can be used to draw attention to whether an account is on stop, to mark the customer as friends & family, also to blacklist a customer, and to stop them from being able to make online bookings.
Creating customer statuses
To create and manage your statuses, navigate to config > settings > statuses. Click ‘new’ under customer statuses to create a new status.
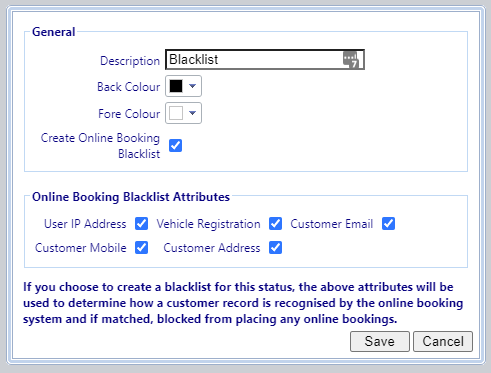
You can enter information for the following fields:
- Description: The visible text.
- Back Colour: The background colour.
- Fore Colour: The colour of the text.
- Create online booking blacklist: A setting that will enable the blocking of online bookings when this status is applied to a customer.
Online booking blacklist attributes
When ‘Create online booking blacklist’ is enabled, you can select several attributes to build up a blacklist to help stop online bookings from specific people. This will help to restrict constant no-shows from making repeat bookings. Below, I’ll explain how all the attributes work, but for this example, let’s assume that you’ve created a status called ‘Blacklist’ with ‘booking blacklist’ enabled and all of the attributes enabled.
- IP Address: If someone attempts to make an online booking from an IP address that matches a customer with the blacklist status, they won’t be able to complete the booking.
- Vehicle registration: If someone attempts to make an online booking using a vehicle registration that matches a customer with the blacklist status, they won’t be able to complete the booking.
- Customer email: If someone attempts to make an online booking using an email address that matches a customer with the blacklist status, they won’t be able to complete the booking.
- Customer mobile: If someone attempts to make an online booking using a mobile number that matches a customer with the blacklist status, they won’t be able to complete the booking.
- Customer address: If someone attempts to make an online booking using an address that matches a customer with the blacklist status, they won’t be able to complete the booking.
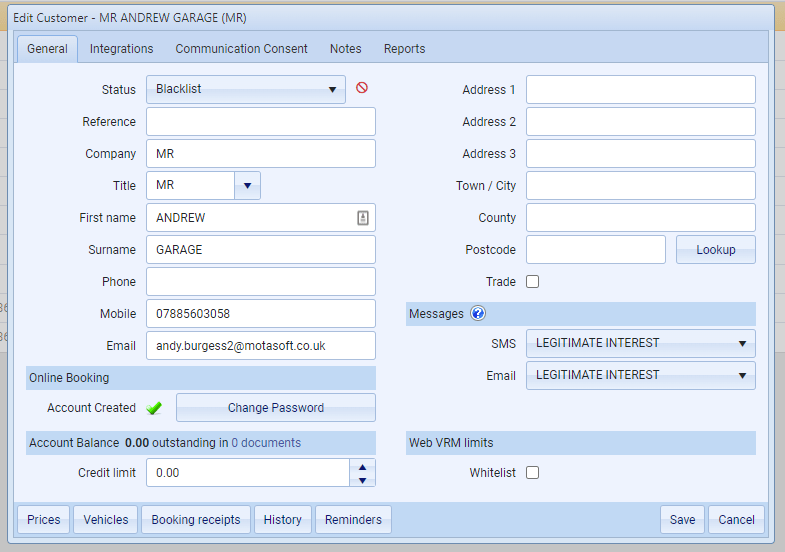
Assigning customer statuses
To assign a custom status to a customer, navigate to search > customers and double-click the customer you wish to apply it to. The status dropdown is the first option available.
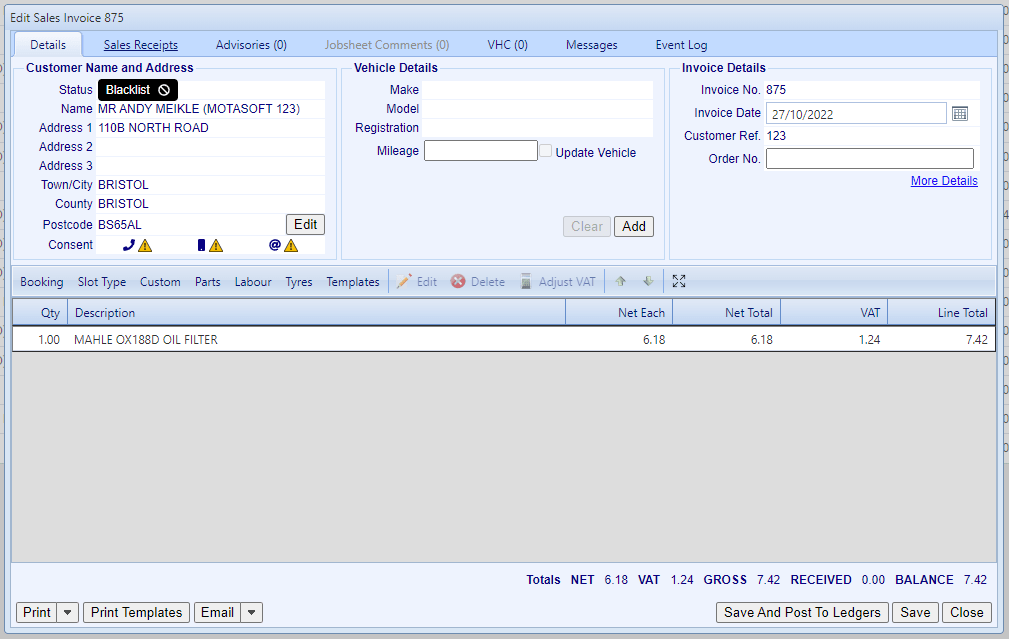
Viewing customer statuses
These statuses will be visible whenever you open a record which has a customer within VGM. For example, when you open a sales invoice.
Removing blacklist statuses
You can use the filters in the toolbar from the customers’ grid (search > customers) to find which customers have specific statuses. From there, you can double-click the customer and clear the status.