To find these settings, navigate to: Config > Settings > Integrations > takepayments

To add a new terminal, click the “New” button under “takepayment Terminals.” This will open the “Add takepayments Terminal” window.
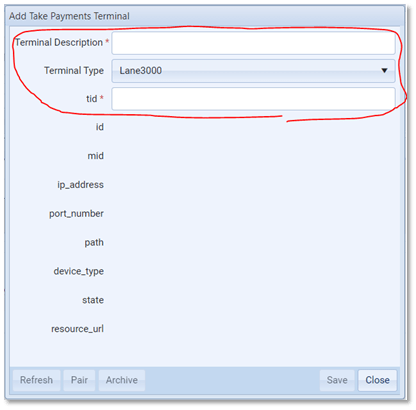
You’ll need to fill in the top three fields:
- Terminal Description: Use this field to provide a helpful description that distinguishes one terminal from another, such as “Cashier 1” or “Back Office.”
- Terminal Type: This field must match the terminal being added. There are currently three options: Lane3000, Move5000, and A920Pro. You can find the terminal type written on the top right-hand side of the terminal.
- tid (Terminal ID): This field is the Terminal ID, which can be found on a small label affixed to the back of the terminal.
Make sure the “Terminal Type” and “Terminal ID” are correct. Once the three fields have been correctly filled, click “Save.”
After saving the details to VGM, click the “Refresh” button. VGM will then query additional information about the terminal from the Take Payments servers.

Please note that only terminals reporting a “Connected” status can accept transactions.