Introduction
This video will quickly demonstrate how you can add a VHC as an item to a jobsheet and how you can then assign it to a technician so that they can perform the vehicle health check using VGM Technician, our technician companion app.
Adding a VHC checklist to a jobsheet.
From the technician planner, you can create a new jobsheet by clicking the Create Jobsheet button in the top left of the screen. Or, to access an existing jobsheet, you can find the jobsheet you wish to edit in the left-hand panel and click Edit Jobsheet. These options are also available to you if you navigate to the jobsheets grid by clicking Jobs > Jobsheets in the top toolbar.
You can also access your jobsheets from the Jobsheets grid and you can click New in the top toolbar to create a new jobsheet or double-click an existing one to open it up.
Note: If a jobsheet has been invoiced, it will be locked.
Once you have the jobsheet open, navigate to the Jobsheet Items tab. The VHC button on the top toolbar will open up your VHC templates to select which checklist you want to perform as part of this job.
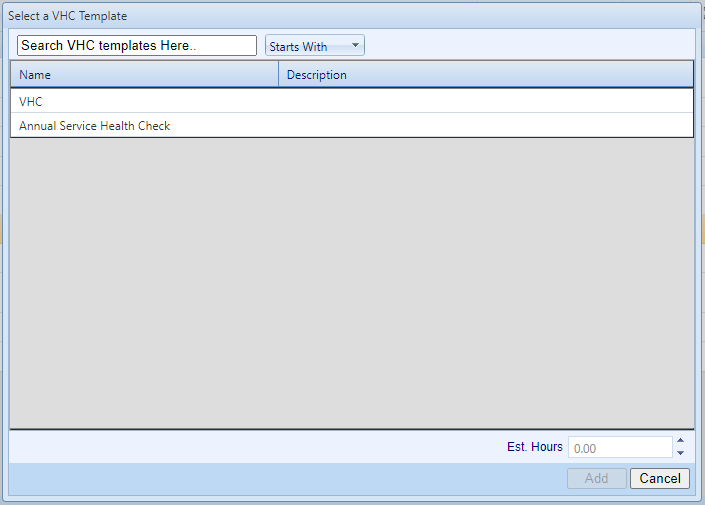
When you click on a checklist, the estimated hours’ textbox will be updated with the value saved against the template, but you can choose to override this value if you wish. Once you have decided on which checklist you want to perform, click add, and the checklist will be added to the checklist items.
Assigning the VHC checklist to a technician.
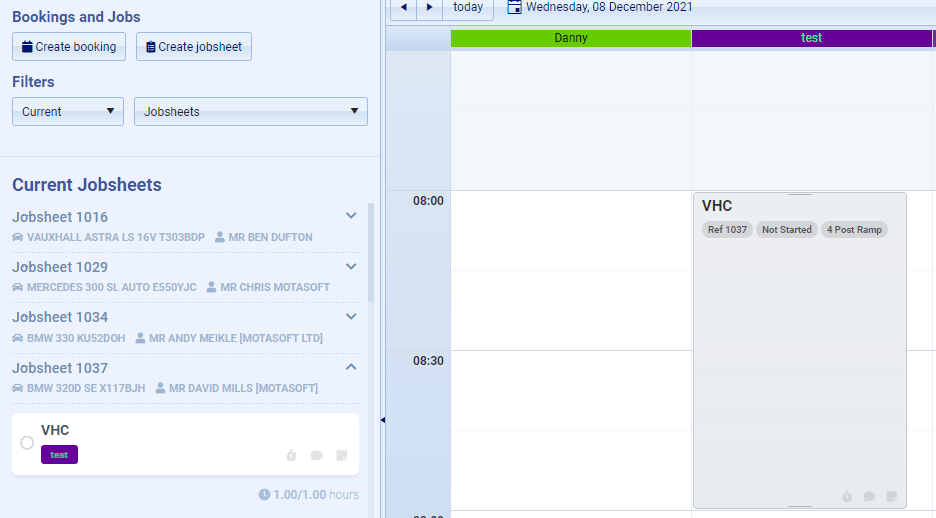
For the checklist to be visible in the technician companion app, VGM Technician, you need to assign the checklist in the technician planner.
Navigate to the Technician Planner, and locate the Jobsheet in the left-hand panel using the various filters. Open up the jobsheet and find the item you wish to assign. You can then drag that jobsheet item onto a technician at a suitable date and time.