Introduction:
This guide will provide you with step-by-step instructions on how to easily create a purchase order and effectively manage stock items and other expenses.
Creating a Purchase Order for Stock Items:
Navigate to the “Parts/Tyres” section and choose “Parts.”

In the lower window, select “Purchase Orders.”

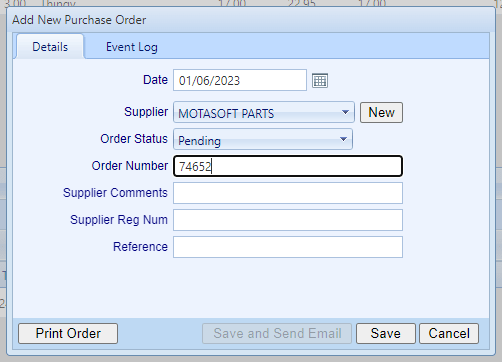
To create a new purchase order, click on “New” and fill in the necessary order details, such as the date, supplier, order status, and order number. Then, click “Save.”
To add stock items to the purchase order, simply double-click on the desired parts in the top window. Specify the required quantity and click the save icon.

If you need to modify the purchase order, select the order and click on “Edit.”
Adding Stock Items:
To add stock items, go to the “Parts/Tyres” section and choose “Parts.” Then, select “Purchase Orders” from the lower window. Pick the relevant purchase order from the drop-down list.
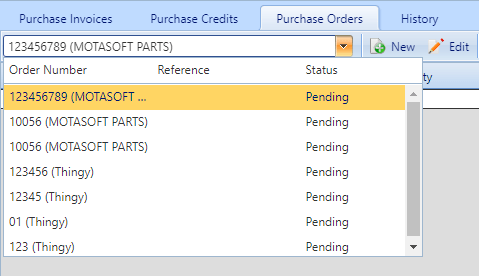
Once the order is selected, click on “Add Stock.”

Provide a Purchase Invoice number, select the supplier, confirm the received quantity, and click the save icon at the end of the row.
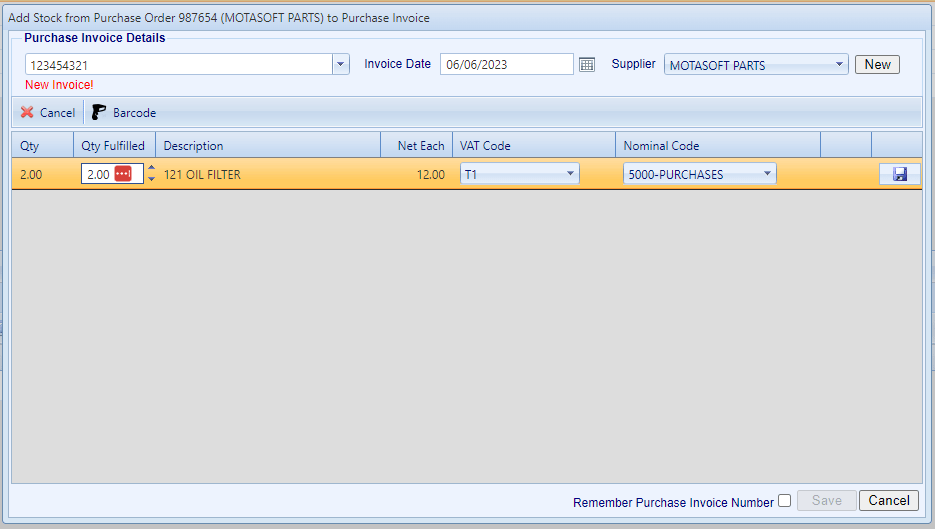
After verifying the received quantities, click on “Save” in the bottom right corner of the window. This action will add the stock items to your inventory.
Creating a Purchase Invoice:
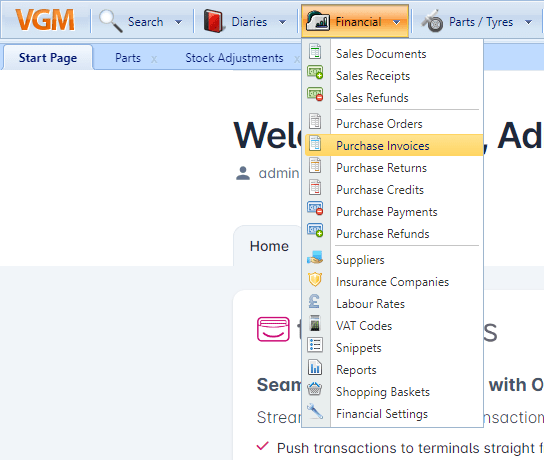
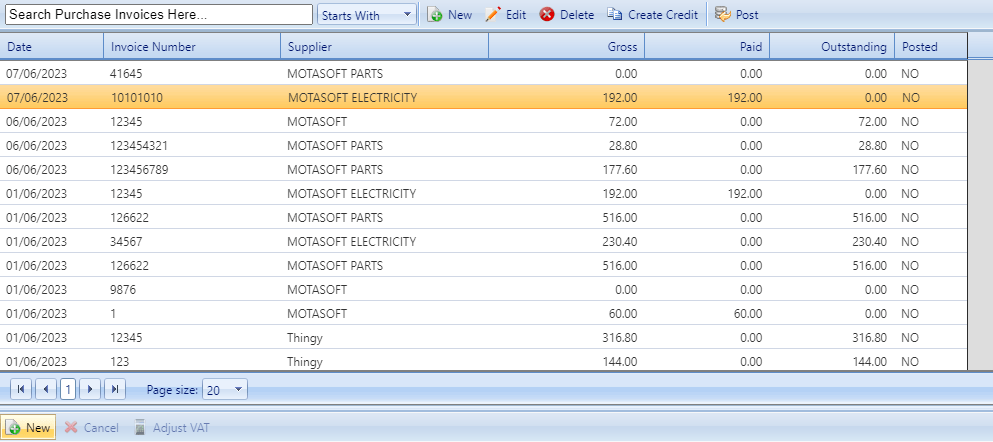
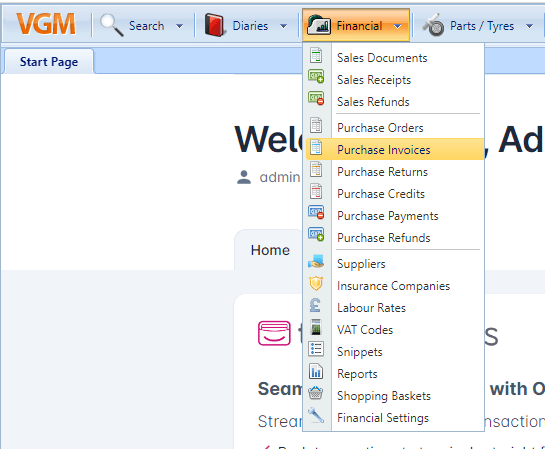
To create a Purchase Invoice, click on the “Financial” tab and select “Purchase Invoice.”
On the Purchase Invoice page, click on “New” in the task bar. Enter the invoice number and add a supplier.

You can either search for an existing supplier in the search bar or fill out the supplier details to add a new one.
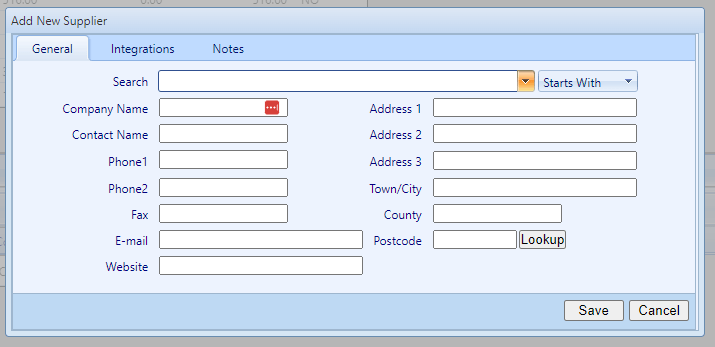
Once you have added the supplier, click on “Save.” Then, select the newly created purchase invoice and click on “New” in the lower window to add the desired items to the invoice.
Enter the quantity, item description, and net cost of each item. Click the save icon at the end of the row to save the information.

If you need to make any changes to the purchase order, return to the purchase orders page, select the specific order, and click on “Edit.” You can also add new items after the initial creation if necessary.
Create Purchase Invoice for Stock Item:
Start by navigating to the “Financial” section and select “Purchase Invoice.”
Select “New” to create a new purchase invoice.

Add the invoice number and fill in the supplier’s details.

To add the supplier, you can either search for a previously used supplier or add a new supplier by providing their details.

Once you have added the supplier, click “Save.”
To add items to the purchase invoice, ensure that the new purchase invoice is highlighted. Then in the bottom window, click on “New” to add items to the invoice.
Enter the quantity, item description, and net cost for each item. Click the save icon at the end of the row to save the information.

Repeat this process to add more items to the purchase invoice, if needed.
To Add a Payment to the Purchase Invoice:
Double-click on the invoice and select the “Payments” tab.
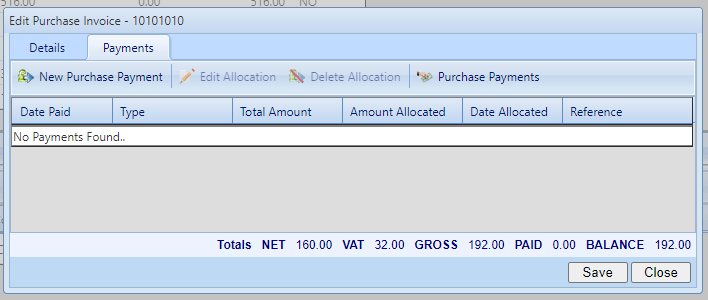
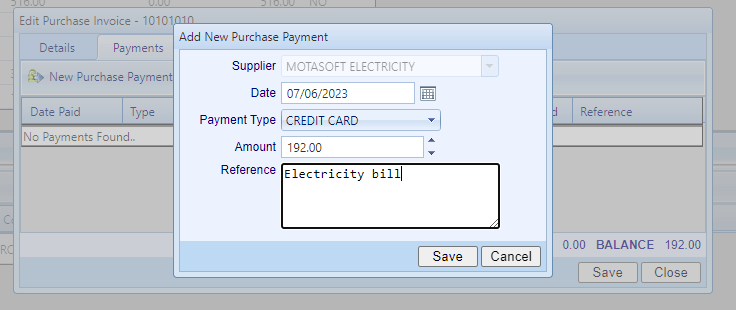
Choose “New Purchase Payment,” confirm the date, payment method, and add a reference if needed. Then, click on “Save.”
Click on “Save” in the previous window to add the payment to the purchase invoice.
By following these steps, you can easily create purchase orders, manage stock items, and add payments to purchase invoices in a professional and efficient manner.